Difference between revisions of "Students/Julian Santos III"
(→Final Project) |
m (→Life Documenting) |
||
| (21 intermediate revisions by the same user not shown) | |||
| Line 1: | Line 1: | ||
'''Julian Jay-Jay Santos III''' | '''Julian Jay-Jay Santos III''' | ||
| − | + | [mailto:jjsantos@ucsd.edu] | |
==About Me== | ==About Me== | ||
===UCSD & Electronics=== | ===UCSD & Electronics=== | ||
| Line 6: | Line 6: | ||
===Visual Arts=== | ===Visual Arts=== | ||
| − | I am colorblind which is ironic because I'm also a visual artist, graphic designer, videographer, illustrator, photographer and all things visual. Ive been working as a Graphic Designer for http://VMIX.com (an internet video platform company) and I also hold an Associates | + | I am colorblind which is ironic because I'm also a visual artist, graphic designer, videographer, illustrator, photographer and all things visual. Ive been working as a Graphic Designer for http://VMIX.com (an internet video platform company) and I also hold an Associates in Arts degree from Southwestern College and sometimes do freelance and personal work under the moniker JS3 for designing, videography and custom DIY projects. |
| + | |||
===Life Documenting=== | ===Life Documenting=== | ||
| − | I'm never without my Casio FC100 still/hd video/slow motion digital camera, G1 Google Phone and Moleskine sketchbooks at hand I love to document my life. I like to take photos of my major meals food and other weird happenstances on my blog and website http://byJS3.com | + | I'm never without my Casio FC100 still/hd video/slow motion digital camera, G1 Google Phone and Moleskine sketchbooks at hand as I love to document my life. I like to take photos of my major meals food and other weird happenstances on my blog and website http://byJS3.com |
I'm also big on everything internet- social networks, blogging, online video, basically anything that has an RSS feed that can be connected and shared with the world. | I'm also big on everything internet- social networks, blogging, online video, basically anything that has an RSS feed that can be connected and shared with the world. | ||
| Line 22: | Line 23: | ||
</gallery> | </gallery> | ||
| − | == Midterm Project == | + | == Midterm Project - Super Mario Jumping Shoe == |
| + | |||
| + | http://lh5.ggpht.com/_6H9oJNORHnM/S6KTCWNhtxI/AAAAAAAATjc/PsunapFVmDo/CIMG2303%20%28Small%29.JPG | ||
| + | ===Description=== | ||
From having an Atari 2600 in my early youth (!) I've become an avid a video gamer all my life. I have always identified with the creativity and problem solving aspects of gaming and have found much of myself with the video game characters. One such character is the popular Nintendo hero of the Super Mario games Mario, who was originally named JumpMan when he first appeared in the video game Donkey Kong. This was probably because he has a distinctive sound he makes when he jumps. To further my love of the character I would like to blend the lines of videogame and reality, and thus I would like to create Super Mario Jumping Shoes. | From having an Atari 2600 in my early youth (!) I've become an avid a video gamer all my life. I have always identified with the creativity and problem solving aspects of gaming and have found much of myself with the video game characters. One such character is the popular Nintendo hero of the Super Mario games Mario, who was originally named JumpMan when he first appeared in the video game Donkey Kong. This was probably because he has a distinctive sound he makes when he jumps. To further my love of the character I would like to blend the lines of videogame and reality, and thus I would like to create Super Mario Jumping Shoes. | ||
To make Super Mario Jumping Shoes I will put a pressure activated switch on the insole of the shoe which will be connected to a Super Mario sound toy that makes the jumping sound when pressed. I will have to dismantle the toy and connect a switch under an insole that is only activated when I jump as opposed to walking which would make less pressure on the button. This will require some circuit bending on my part. I could probably accomplish this with extra padding or use a normally closed switch that activates the circuit when my foot leaves my shoe's sole when I jump. | To make Super Mario Jumping Shoes I will put a pressure activated switch on the insole of the shoe which will be connected to a Super Mario sound toy that makes the jumping sound when pressed. I will have to dismantle the toy and connect a switch under an insole that is only activated when I jump as opposed to walking which would make less pressure on the button. This will require some circuit bending on my part. I could probably accomplish this with extra padding or use a normally closed switch that activates the circuit when my foot leaves my shoe's sole when I jump. | ||
| − | + | ===Documentation=== | |
| − | http://www.consolereview.net/images/reviews/super_mario_toy_1.jpg | + | http://www.consolereview.net/images/reviews/super_mario_toy_1.jpg |
http://lh6.ggpht.com/_6H9oJNORHnM/S6KTCppF8oI/AAAAAAAATkM/Vj_p6FMoGuo/s512/CIMG2306%20%28Small%29.JPG | http://lh6.ggpht.com/_6H9oJNORHnM/S6KTCppF8oI/AAAAAAAATkM/Vj_p6FMoGuo/s512/CIMG2306%20%28Small%29.JPG | ||
http://lh5.ggpht.com/_6H9oJNORHnM/S6KTC0QzVfI/AAAAAAAATjo/hKsTkaTOKr0/CIMG2291%20%28Small%29.JPG | http://lh5.ggpht.com/_6H9oJNORHnM/S6KTC0QzVfI/AAAAAAAATjo/hKsTkaTOKr0/CIMG2291%20%28Small%29.JPG | ||
| Line 34: | Line 38: | ||
http://lh5.ggpht.com/_6H9oJNORHnM/S6KTHvxo7wI/AAAAAAAATj0/CZfiDzBjVo0/CIMG2251%20%28Small%29.JPG | http://lh5.ggpht.com/_6H9oJNORHnM/S6KTHvxo7wI/AAAAAAAATj0/CZfiDzBjVo0/CIMG2251%20%28Small%29.JPG | ||
http://lh5.ggpht.com/_6H9oJNORHnM/S6KTfOPStgI/AAAAAAAATkA/-i1QsfmcvaA/CIMG2248%20%28Small%29.JPG | http://lh5.ggpht.com/_6H9oJNORHnM/S6KTfOPStgI/AAAAAAAATkA/-i1QsfmcvaA/CIMG2248%20%28Small%29.JPG | ||
| − | |||
| − | ==Final Project== | + | ==Final Project - Arduino Scratch Game Controller== |
| − | === | + | (aka The Arduino Entertainment System controller)<br> |
| + | Video Presentation & Demonstration: http://www.youtube.com/watch?v=FUZJilcAod4 | ||
| + | <br> | ||
| + | http://lh6.ggpht.com/_6H9oJNORHnM/S6Mia3fDBpI/AAAAAAAATks/ujbnoFYDoRc/s800/arduino%20entertainment%20system1.png | ||
| + | http://lh5.ggpht.com/_6H9oJNORHnM/S6P_sr53khI/AAAAAAAATlM/0iESde797po/s640/CIMG2632.JPG | ||
| + | |||
| + | ===Description=== | ||
As someone who has a deep affinity with classic videogames, I have always wanted to create and understand the media more. From analog joysticks to the newly developed accelerometer controllers, I am intrigued by the ways a digital object onscreen could be controlled by a physical analog device in the real world. To further this interest, I wanted to recreate a classic videogame as well as recreate a gamepad controller using an Arduino Microcontroller. | As someone who has a deep affinity with classic videogames, I have always wanted to create and understand the media more. From analog joysticks to the newly developed accelerometer controllers, I am intrigued by the ways a digital object onscreen could be controlled by a physical analog device in the real world. To further this interest, I wanted to recreate a classic videogame as well as recreate a gamepad controller using an Arduino Microcontroller. | ||
| Line 45: | Line 54: | ||
To help with this transition, I found a simplified controller board specifically made for use with Scratch called a Picoboard [http://www.picocricket.com/picoboard.html] which has sensors and functions much like an Arduino. In order to use the Arduino with Scratch I reappropriated code from a Scratch-board simulation site [http://www.yengawa.com/scratch_arduino] which allows the Arduino to be used in the same way as a Picoboard. | To help with this transition, I found a simplified controller board specifically made for use with Scratch called a Picoboard [http://www.picocricket.com/picoboard.html] which has sensors and functions much like an Arduino. In order to use the Arduino with Scratch I reappropriated code from a Scratch-board simulation site [http://www.yengawa.com/scratch_arduino] which allows the Arduino to be used in the same way as a Picoboard. | ||
| − | On the Arduino, I substituted a potentiometer and a push-button switch to respectively replace the functions on the Picoboard. To complete the controller I wired and soldered all the parts into a plastic housing. I chose to remake the classic topdown shooting videogame Centipede to accommodate the controller. The game is also perfect for using the potentiometer as its dial doesnt rotate a full 360 degrees and the player's controlled vessel in Centipede only moves left and right in a limited enclosed play area (as opposed to a game where the player's controlled vessel has a free full range of motion where at least a four-point setup is needed). | + | On the Arduino, I substituted a potentiometer and a push-button switch to respectively replace the slider and button functions on the Picoboard. To complete the controller I wired and soldered all the parts into a plastic housing. I chose to remake the classic topdown shooting videogame Centipede to accommodate the controller. The game is also perfect for using the potentiometer as its dial doesnt rotate a full 360 degrees and the player's controlled vessel in Centipede only moves left and right in a limited enclosed play area (as opposed to a game where the player's controlled vessel has a free full range of motion where at least a four-point setup is needed). |
I found a Scratch project example of Centipede and reconfigured the language to be used by the Arduino Controller. A roadbump that I found from translating the Arduino's controller to the Scratch game was that the potentiometer read as 0-100, but this was solved creating variables that would set its orientation based on the sensor value. | I found a Scratch project example of Centipede and reconfigured the language to be used by the Arduino Controller. A roadbump that I found from translating the Arduino's controller to the Scratch game was that the potentiometer read as 0-100, but this was solved creating variables that would set its orientation based on the sensor value. | ||
| Line 52: | Line 61: | ||
http://scratch.mit.edu/projects/Janussaint/937832 | http://scratch.mit.edu/projects/Janussaint/937832 | ||
| − | ===Video and | + | ===Video and Image Documentation=== |
| + | Video presentation and demonstration via Youtube:<br> | ||
| + | '''http://www.youtube.com/watch?v=FUZJilcAod4''' | ||
| + | <br> | ||
| − | + | http://lh4.ggpht.com/_6H9oJNORHnM/S6P_tDPYkEI/AAAAAAAATlQ/pI04kJu24bQ/s640/CIMG2633.JPG<br> | |
| + | Final product with controller decal | ||
| + | <gallery> | ||
| + | Image:Controller1.jpg|Controller housing | ||
| + | Image:JjsantosScratchCentipede.jpg|Centipede game program in Scratch application | ||
| + | Image:JjsantosControllerinnards.jpg|The innards of the controller- Arduino, breadboard and wiring | ||
| + | </gallery> | ||
| + | ===Function Diagram and Schematic=== | ||
| + | [[Image:JjsantosDiagram1.jpg]] | ||
| + | [[Image:Schematic1.jpg]] | ||
===Arduino Code=== | ===Arduino Code=== | ||
| Line 62: | Line 83: | ||
/* | /* | ||
ScratchBoard compatible program | ScratchBoard compatible program | ||
| − | + | Created 30 Sept. 2009 | |
| + | by Koji Yokokawa (http://www.yengawa.com) | ||
| + | |||
| + | edited by Julian Santos III for Centipede game for use with Arduino | ||
*/ | */ | ||
Latest revision as of 21:24, 19 March 2010
Julian Jay-Jay Santos III [1]
Contents
About Me
UCSD & Electronics
I am a Super Senior at UCSD with a major in Visual Arts Media with an Emphasis in Computing. The main reason I'm taking Electronic Technologies for Arts is because it fulfills major requirements plus my world is driven by anything electric and to understand it better is like understanding my blood. I have some electronics experience in soldering, wiring and basically taking things apart to see how they work or hacking and customizing the parts to my liking.
Visual Arts
I am colorblind which is ironic because I'm also a visual artist, graphic designer, videographer, illustrator, photographer and all things visual. Ive been working as a Graphic Designer for http://VMIX.com (an internet video platform company) and I also hold an Associates in Arts degree from Southwestern College and sometimes do freelance and personal work under the moniker JS3 for designing, videography and custom DIY projects.
Life Documenting
I'm never without my Casio FC100 still/hd video/slow motion digital camera, G1 Google Phone and Moleskine sketchbooks at hand as I love to document my life. I like to take photos of my major meals food and other weird happenstances on my blog and website http://byJS3.com I'm also big on everything internet- social networks, blogging, online video, basically anything that has an RSS feed that can be connected and shared with the world.
Field Research
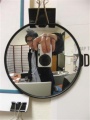
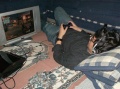
Self portrait of me using my Casio FC-100 digital camera which literally never leaves my side. Besides stills the camera also shoots HD 720p video and high speed slow motion 200fps to 1000fps slow motion. A little film of my dogs jumping in slow motion using the camera http://www.youtube.com/user/janussaint#p/u/4/RAGT-RwSWn4
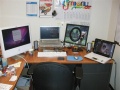
Desk at work. The iMac and the iMacBook Pro (hooked up to a second monitor) are my work computers and the HP Laptop PC is my personal computer.
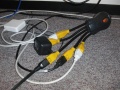
My friendly Power Squid, which not only brings life to my devices but is designed to look awesome.
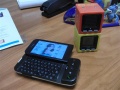
My G1 Google smart phone using Android OS. I hacked the phone to use CyanogenMod OS which uses custom open sourced code for Android OS. I literally have 320 applications on the phone and my life is connected to Google 24/7 (google Gmail, reader, calendar, maps, etc). Next to it are my Cube World people desk toy which interacts with each other based on the orientation of the cubes.
Playing Call of Duty Modern Warfare 2 on the Playstation 3 on my LCD monitor at a friend's house. This night 5 of us brought our own monitors and PS3s and had a good ol' nerdy LAN party.

A downtown club that I frequent called Voyeur which features a wall with thousands of LEDs and has a webcam. A DJ stations himself in front of this wall and the LEDs are synchronized to the music. http://www.youtube.com/watch?v=dM_t-oo-uWs
.JPG)
.JPG)
.JPG)
.JPG)
.JPG)
.jpg)
Midterm Project - Super Mario Jumping Shoe
Description
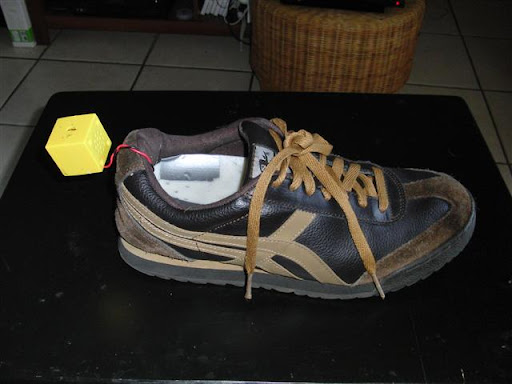
From having an Atari 2600 in my early youth (!) I've become an avid a video gamer all my life. I have always identified with the creativity and problem solving aspects of gaming and have found much of myself with the video game characters. One such character is the popular Nintendo hero of the Super Mario games Mario, who was originally named JumpMan when he first appeared in the video game Donkey Kong. This was probably because he has a distinctive sound he makes when he jumps. To further my love of the character I would like to blend the lines of videogame and reality, and thus I would like to create Super Mario Jumping Shoes.
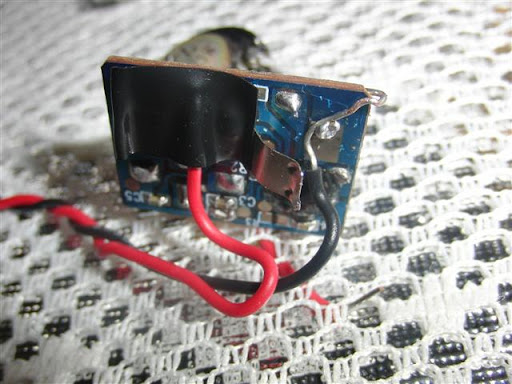
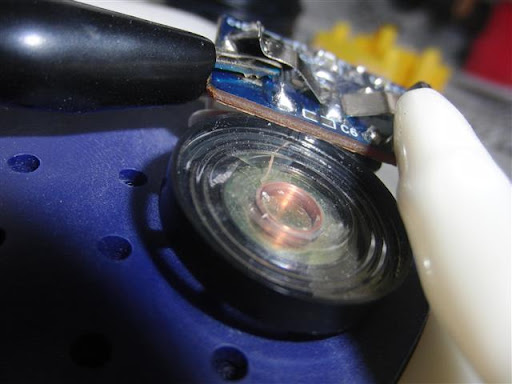
To make Super Mario Jumping Shoes I will put a pressure activated switch on the insole of the shoe which will be connected to a Super Mario sound toy that makes the jumping sound when pressed. I will have to dismantle the toy and connect a switch under an insole that is only activated when I jump as opposed to walking which would make less pressure on the button. This will require some circuit bending on my part. I could probably accomplish this with extra padding or use a normally closed switch that activates the circuit when my foot leaves my shoe's sole when I jump.
Documentation


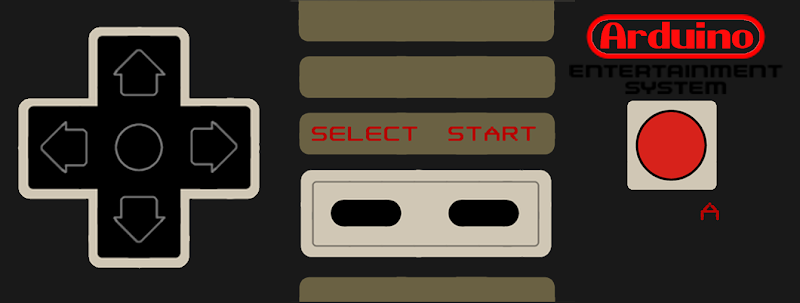
Final Project - Arduino Scratch Game Controller
(aka The Arduino Entertainment System controller)
Video Presentation & Demonstration: http://www.youtube.com/watch?v=FUZJilcAod4
Description
As someone who has a deep affinity with classic videogames, I have always wanted to create and understand the media more. From analog joysticks to the newly developed accelerometer controllers, I am intrigued by the ways a digital object onscreen could be controlled by a physical analog device in the real world. To further this interest, I wanted to recreate a classic videogame as well as recreate a gamepad controller using an Arduino Microcontroller.
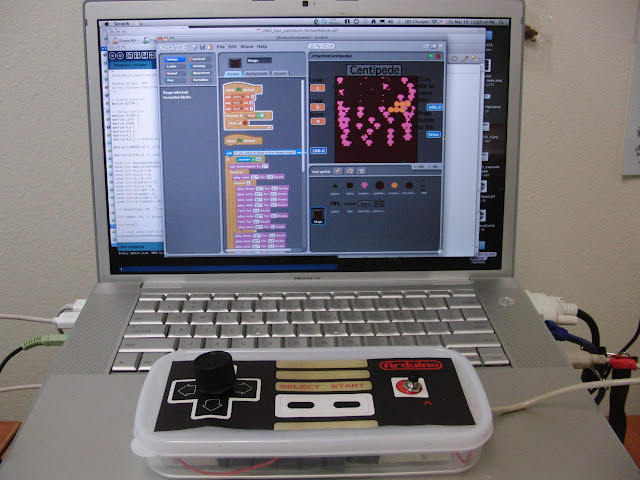
After further research on how this could be best accomplished, I stumbled upon Scratch [2] a unique programming platform that makes it easy to create rough sketches of interactive digital media due to its real time condition testing and straight forward approach to program design. After some time being familiar with Scratch, I decided that I was going to recreate a classic videogame while using what I have learned from Arduino programming to make it function as a gamepad.
To help with this transition, I found a simplified controller board specifically made for use with Scratch called a Picoboard [3] which has sensors and functions much like an Arduino. In order to use the Arduino with Scratch I reappropriated code from a Scratch-board simulation site [4] which allows the Arduino to be used in the same way as a Picoboard.
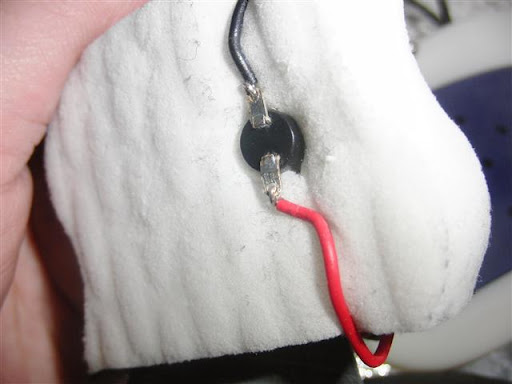
On the Arduino, I substituted a potentiometer and a push-button switch to respectively replace the slider and button functions on the Picoboard. To complete the controller I wired and soldered all the parts into a plastic housing. I chose to remake the classic topdown shooting videogame Centipede to accommodate the controller. The game is also perfect for using the potentiometer as its dial doesnt rotate a full 360 degrees and the player's controlled vessel in Centipede only moves left and right in a limited enclosed play area (as opposed to a game where the player's controlled vessel has a free full range of motion where at least a four-point setup is needed).
I found a Scratch project example of Centipede and reconfigured the language to be used by the Arduino Controller. A roadbump that I found from translating the Arduino's controller to the Scratch game was that the potentiometer read as 0-100, but this was solved creating variables that would set its orientation based on the sensor value.
The final result can be found in this link (but can only be playable using the Arduino Controller). http://scratch.mit.edu/projects/Janussaint/937832
Video and Image Documentation
Video presentation and demonstration via Youtube:
http://www.youtube.com/watch?v=FUZJilcAod4
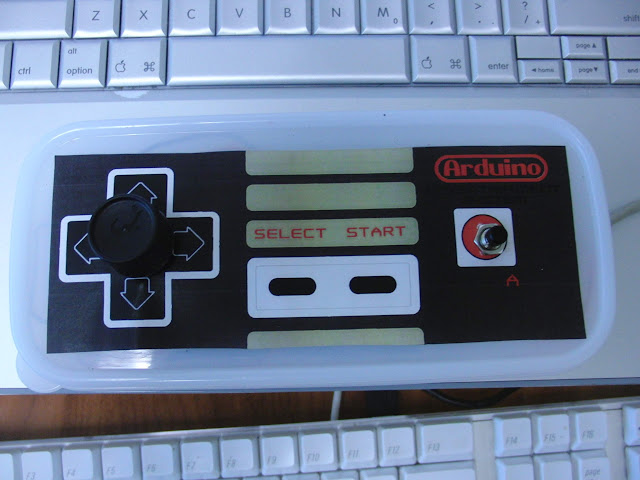
Final product with controller decal
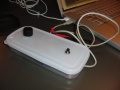
Controller housing
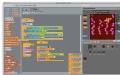
Centipede game program in Scratch application
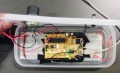
The innards of the controller- Arduino, breadboard and wiring


Function Diagram and Schematic


Arduino Code
/*
 ScratchBoard compatible program
 Created 30 Sept. 2009
 by Koji Yokokawa (http://www.yengawa.com)

edited by Julian Santos III for Centipede game for use with Arduino
 */

// digital input pin
#define BUTTON 2 //normally open push button switch

// analog input pin
#define SLIDER 0 //connected to a 100k pontentiometer
#define LIGHT  1 // for using light sensors
#define SOUND  2 // for a mic
#define R_A 3
#define R_B 4
#define R_C 5
#define R_D 5 // 3-5 analog inputs

#define FIRMWAEW_ID 4  // ScratchBoard 1.1 Firmware ID

#define LED_PIN 13  // response lamp (digital pin 13 is on board LED)

const byte req_scratchboard = 1;  // request messge from Scratch
const byte mask_scratcharduino = 240;  // request mask of Scratch+Ardunio
const byte ch_r_D = 0;
const byte ch_r_C = 1;
const byte ch_r_B = 2;
const byte ch_button = 3;
const byte ch_r_A = 4;
const byte ch_light = 5;
const byte ch_sound = 6;
const byte ch_slider = 7;
const byte ch_firmware = 15;

int sensorValue = 0;  // sensor value to send

byte inByte = 0;  // incoming serial byte

void setup()
{
  // start serial port at 9600 bps:
  Serial.begin(38400);
  pinMode(BUTTON, INPUT);   // digital sensor is on digital pin 2

  // initialize the digital pin as an output:
  pinMode(LED_PIN, OUTPUT);
  //digitalWrite(LED_PIN, HIGH);   // set the LED on

}

void loop()
{
  // if we get a valid byte, read analog ins:
  if (Serial.available() > 0) {
    // get incoming byte:
    inByte = Serial.read();
    if (inByte == req_scratchboard) {
      digitalWrite(LED_PIN, HIGH);   // set the LED on

      sendValue(ch_firmware, FIRMWAEW_ID);
      delay(10);

      // analog read range from 0 to 1023
      // delay 10ms to let the ADC recover:

      sensorValue = analogRead(R_D);
      sendValue(ch_r_D, sensorValue);
      delay(10);

      sensorValue = analogRead(R_C);
      sendValue(ch_r_C, sensorValue);
      delay(10);

      sensorValue = analogRead(R_B);
      sendValue(ch_r_B, sensorValue);
      delay(10);

      // read  switch, map it to 0 or 1023L
      sensorValue = map(digitalRead(BUTTON), 0, 1, 0, 1023);
      sendValue(ch_button, sensorValue);

      sensorValue = analogRead(R_A);
      sendValue(ch_r_A, sensorValue);
      delay(10);

      sensorValue = analogRead(LIGHT);
      sendValue(ch_light, sensorValue);
      delay(10);

      sensorValue = analogRead(SOUND);
      sendValue(ch_sound, sensorValue);
      delay(10);

      sensorValue = analogRead(SLIDER);
      sendValue(ch_slider, sensorValue);
      delay(10);

      digitalWrite(LED_PIN, LOW);    // set the LED off
    }
  }
}

void sendValue(byte channel, int value) {
  byte high = 0;  // high byte to send
  byte low = 0;  // low byte to send
  high = (1 << 7) | (channel << 3) | (value >> 7);
  low =  (0xff >> 1) & value;
  Serial.write(high);
  Serial.write(low);
}